CloudFlare 적용 후 IP 더 확실하게 숨기기
, -1 views
클라우드플레어를 적용해두면 IP를 숨길 수 있어요. ping 요청을 보내도 클라우드플레어의 IP가 나오고 원본 IP는 나오지 않아요.
그런데, 0.0.0.0부터 255.255.255.255까지 모든 IP를 다 확인해버리는 뵨태들이 있어요.
클라우드플레어를 적용해놓고 아무것도 안하면, 저런 뵨태들한테 IP를 다 털려요.
저건 본인 서버에 클라우드플레어 소유 IP만 접속 가능하게 막아두면 해결되는거에요. 이 과정에서 IP로 바로 웹사이트로 접속하는 것도 같이 막혀요.
클라우드플레어의 IP들은 여기서 확인할 수 있어요.
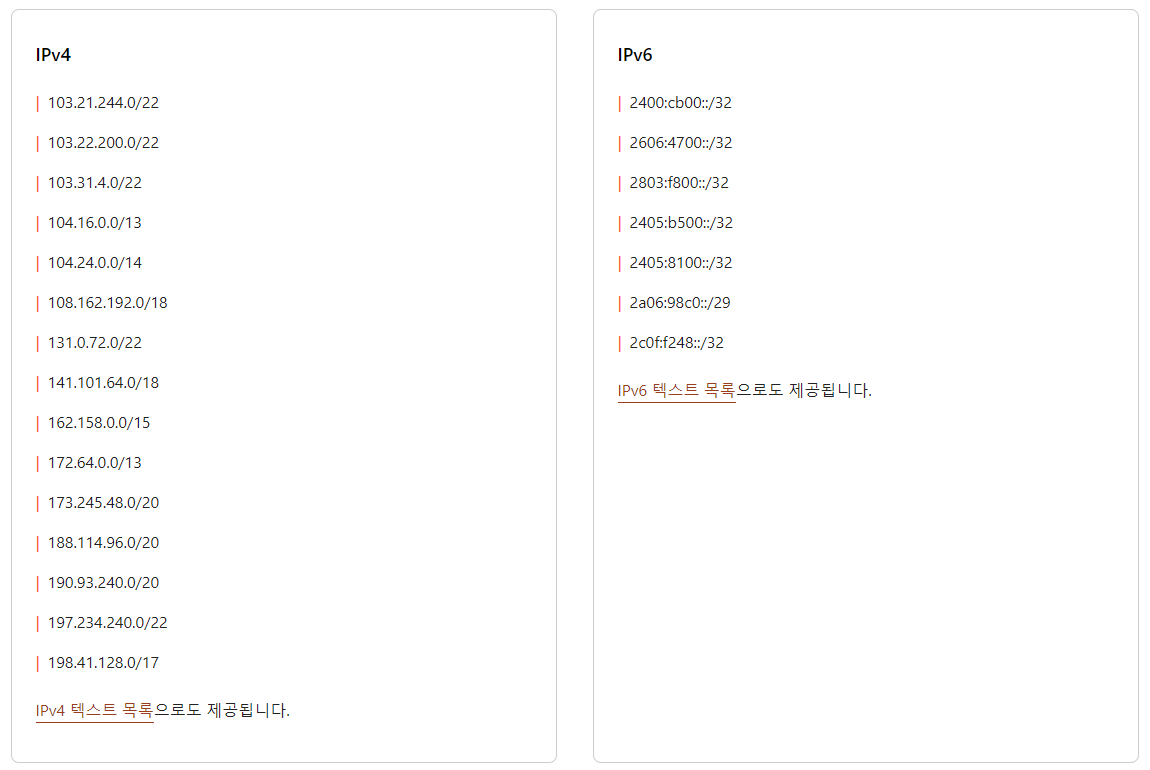
저 IP들만 80번 포트로 들어올 수 있도록 설정하면 되는거에요.
$ sudo ufw delete allow 80  //80번 포트 닫음
$ sudo ufw allow from 103.21.244.0/22 to any port 80  //일일이 추가
$ sudo ufw allow from 103.22.200.0/22 to any port 80
.
.
.
근데, 전 귀찮아서 .sh 파일로 만들어서 서버에 올려두고 실행했어요.
$ sudo ufw delete allow 80  //80번 포트 닫음
$ sudo chmod 777  //어차피 한 번 쓰고 버릴꺼니까, 실행 가능해지도록 모든 권한 부여
$ sudo ./ips.sh
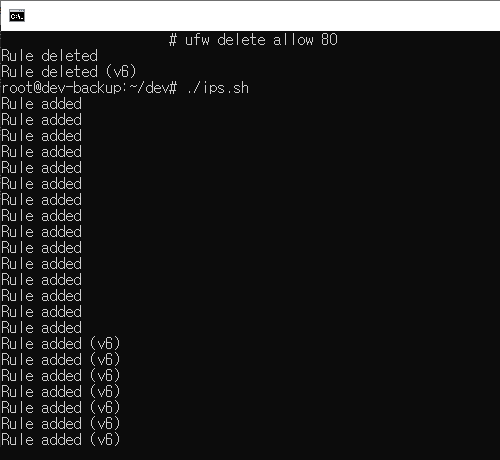
ips.sh 파일의 내용은 이렇게 생겼어요.
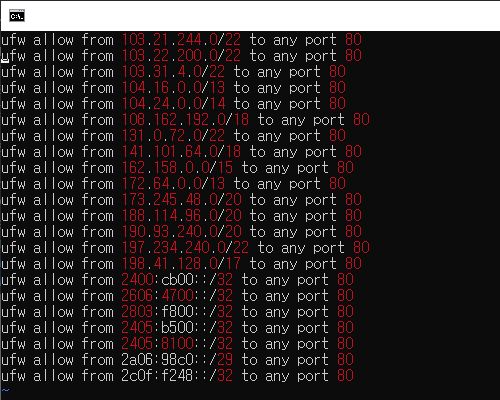
ufw allow from 103.21.244.0/22 to any port 80
ufw allow from 103.22.200.0/22 to any port 80
ufw allow from 103.31.4.0/22 to any port 80
ufw allow from 104.16.0.0/13 to any port 80
ufw allow from 104.24.0.0/14 to any port 80
ufw allow from 108.162.192.0/18 to any port 80
ufw allow from 131.0.72.0/22 to any port 80
ufw allow from 141.101.64.0/18 to any port 80
ufw allow from 162.158.0.0/15 to any port 80
ufw allow from 172.64.0.0/13 to any port 80
ufw allow from 173.245.48.0/20 to any port 80
ufw allow from 188.114.96.0/20 to any port 80
ufw allow from 190.93.240.0/20 to any port 80
ufw allow from 197.234.240.0/22 to any port 80
ufw allow from 198.41.128.0/17 to any port 80
ufw allow from 2400:cb00::/32 to any port 80
ufw allow from 2606:4700::/32 to any port 80
ufw allow from 2803:f800::/32 to any port 80
ufw allow from 2405:b500::/32 to any port 80
ufw allow from 2405:8100::/32 to any port 80
ufw allow from 2a06:98c0::/29 to any port 80
ufw allow from 2c0f:f248::/32 to any port 80